Introduction
In this chapter, we will understand how an existing HTTP connection is upgraded to WebSocket connection using the WebSocket handshake.
We will implement this handshake from scratch using Node.js with TypeScript, we will only be using http and net modules.
Along the way, we’ll break down the HTTP request headers involved in the upgrade process and see how they are validated and transformed into a WebSocket connection.
In this chapter, we’ll use the Chrome DevTools console to create a WebSocket connection and observe the handshake flow in action.
What we’ll cover here:
- Upgrade: websocket flow
- Sec-WebSocket-Key → Sec-WebSocket-Accept
- SHA-1 + Base64
- 101 Switching Protocols
Steps to follow:
Step 1: Create an HTTP Server and Listen for Upgrade Requests
We start by creating a basic HTTP server using Node.js. Although we don’t deal with TCP directly in our code, Node.js internally creates a TCP server and relies on the operating system to complete the TCP handshake. Once the TCP connection is established, Node.js begins parsing incoming data as HTTP.
const server = http.createServer((req, res) => {
  res.writeHead(426, { connection: 'close' });
  res.end('Need WebSocket Upgrade');
});
This server is not meant to handle normal HTTP traffic. Our goal is to accept only WebSocket connections.
If a regular HTTP request is received, we respond with 426 Upgrade Required and immediately close the connection.
WebSocket communication does not happen over normal HTTP request–response cycles.
After the WebSocket handshake, the same TCP connection switches protocols and is no longer governed by HTTP rules. This explicitly tells the client that this endpoint only supports WebSocket upgrades.
Step 2: Listen for the HTTP Upgrade Event
server.on('upgrade', (req: IncomingMessage, socket: Socket) => {
  handleWebSocketHandshake(req, socket);

  socket.on('data', () => {
    try {
      // TODO: parser
    } catch (e) {
      console.error(e);
    }
  });

  socket.on('error', (e: Error) =>
    console.log('Error connecting WebSocket', e),
  );

  socket.on('end', () => console.log('Socket connection ended.'));
});
At this point the connection is still HTTP. Client sends a request with Upgrade header set to “websocket” and Connection header set to “Upgrade” to switch to WebSocket. Then server validates the request and if valid, it upgrades the connection to WebSocket.
This is how a valid http upgrade request looks like:
GET / HTTP/1.1
Host: localhost:3000
Connection: Upgrade
Upgrade: websocket
Sec-WebSocket-Version: 13
Sec-WebSocket-Key: dGhlIHNhbXBsZSBub25jZQ==
Here is what these headers mean:
Connection: Upgrade- This indicates a protocol upgrade.Upgrade: websocket- Indicates the target protocol.Sec-WebSocket-Version: 13- Indicates the version of the WebSocket protocol. Which must be 13 because it’s the current standard version.Sec-WebSocket-Key: dGhlIBHhbJPnZSBub25jZQ==- A random base64 encoded string used for verification.
Then server validates the request and creates a response with 101 Switching Protocols status code.
In order to create a valid response, server needs to calculate a Sec-WebSocket-Accept header value.
const WS_GUID = '258EAFA5-E914-47DA-95CA-C5AB0DC85B11';
const acceptKey = crypto
    .createHash('sha1')
    .update(`${secWebSocketKey}${WS_GUID}`)
    .digest('base64');
Here GUID is a constant string that is used to calculate the accept key and it must be exactly the same as the one used by the browser. Then it returns a base64 encoded string which is the Sec-WebSocket-Accept header value. This is then sent back to the client in the response.
Then client validates the response and if valid, it upgrades the connection to WebSocket.
Here is a full example code:
const handleWebSocketHandshake = (req: IncomingMessage, socket: Socket) => {
  const {
    upgrade,
    connection,
    'sec-websocket-version': secWebSocketVersion,
    'sec-websocket-key': secWebSocketKey,
  } = req.headers;

  const isWebSocketConnection =
    upgrade?.toLowerCase() === 'websocket' &&
    secWebSocketVersion === '13' &&
    connection?.toLowerCase().includes('upgrade') &&
    secWebSocketKey?.length !== 0;

  if (!isWebSocketConnection) {
    socket.write('HTTP/1.1 400 Bad Request\r\nConnection: close\r\n\r\n');
    socket.destroy();
    return;
  }

  const acceptKey = crypto
    .createHash('sha1')
    .update(`${secWebSocketKey}${WS_GUID}`)
    .digest('base64');

  const response = [
    'HTTP/1.1 101 Switching Protocols',
    'Upgrade: websocket',
    'Connection: Upgrade',
    `Sec-WebSocket-Accept: ${acceptKey}`,
    '\r\n',
  ].join('\r\n');

  socket.write(response);
  socket.setNoDelay(true);
};
setNoDelay(true) is used to disable Nagle’s algorithm which is used to reduce the number of small packets sent over the network. It avoids delaying small frames, which is important for real-time communication.
After this, the connection is upgraded to WebSocket and the client and server can start sending and receiving data over the same connection.
Step 3: See It in Action
- Open the browser console and run the following code:
const ws = new WebSocket('ws://localhost:5000');
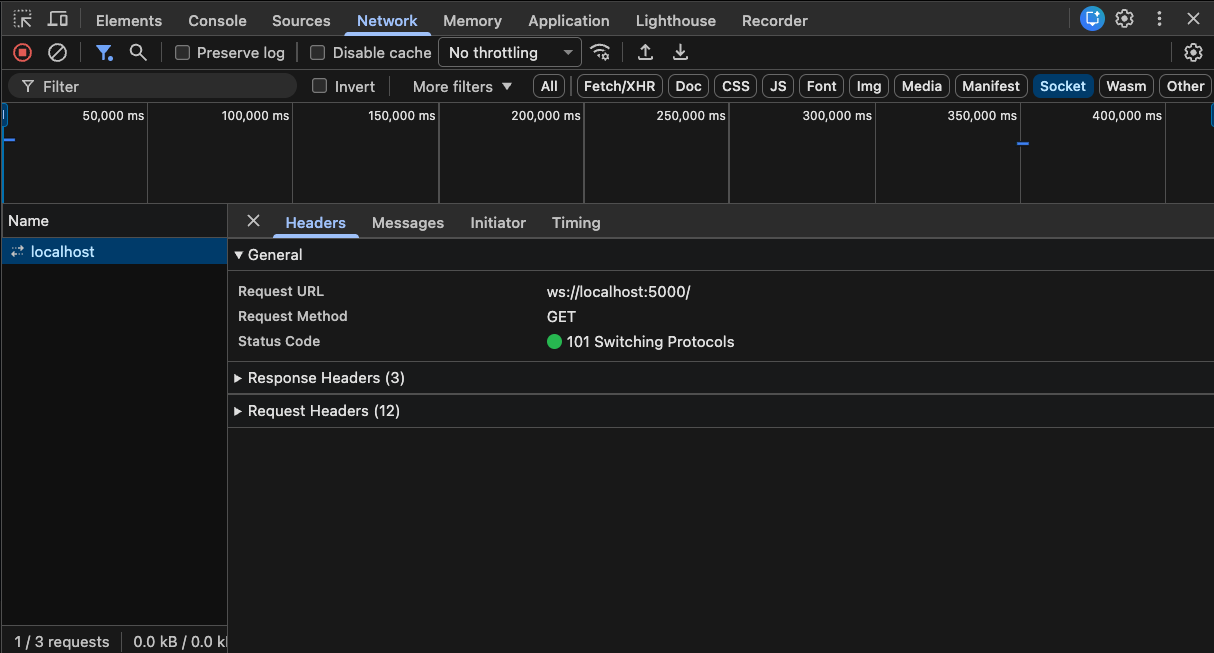
Open DevTools → Network → Sockets (or WS).
Select the connection (localhost) and you should see the status code as 101 Switching Protocols.
Summary
We have seen how an HTTP connection is upgraded to a WebSocket connection using the WebSocket handshake.
In the next chapter, we will understand the WebSocket frame format and how to parse it.
Source code: https://github.com/Saurabh-kayasth/websocket-from-scratch